Discription of Shield Plus Cleaner
Shield Plus Cleaner is proved to be a tricky malware which pretends to be a useful tool that can help you clean up various malware and viruses effectively, and boost your computer's speed and performance. However, the opposite is true. It not only cannot remove hazardous threats but also brings more dangers into your computer. So, you should pay more attention to this hated malware and master methods to delete it safely.
When some fake alarms pops up to warn you that your computer is attacked and infected by malicious programs and Trojan viruses, you will see Sheild Plus Cleaner appear in the screen to ask you to pay the money for it. If you are cheated unfortunately, then you will find the situation gets worse. After the installation and execution, it brings more malware and viruses rather than clean up them. It gives the opportunity to other junk software and viruses which sneak into your computer without notice, then you will be confused that why your system run so slowly and strangely in that they take up too much system space and waste system resources. Then your computer will get more and more infections.
Through the mention above, it is clear that Sheild Plus Cleaner is a pesky and harmful malware. If you see it appear suddenly in the screen, do not be cheated by it. And here below are two method listed which can assist you in eliminating Sheild Plus Cleaner if you need.
Two Methods to Delete Shield Plus Cleaner Safely
Shield Plus Cleaner is proved to be a tricky malware which pretends to be a useful tool that can help you clean up various malware and viruses effectively, and boost your computer's speed and performance. However, the opposite is true. It not only cannot remove hazardous threats but also brings more dangers into your computer. So, you should pay more attention to this hated malware and master methods to delete it safely.
When some fake alarms pops up to warn you that your computer is attacked and infected by malicious programs and Trojan viruses, you will see Sheild Plus Cleaner appear in the screen to ask you to pay the money for it. If you are cheated unfortunately, then you will find the situation gets worse. After the installation and execution, it brings more malware and viruses rather than clean up them. It gives the opportunity to other junk software and viruses which sneak into your computer without notice, then you will be confused that why your system run so slowly and strangely in that they take up too much system space and waste system resources. Then your computer will get more and more infections.
Through the mention above, it is clear that Sheild Plus Cleaner is a pesky and harmful malware. If you see it appear suddenly in the screen, do not be cheated by it. And here below are two method listed which can assist you in eliminating Sheild Plus Cleaner if you need.
Two Methods to Delete Shield Plus Cleaner Safely
Method A. Manually Removal
Method B. Automatic Removal
Choose one method you prefer.
Method A. Manually Removal
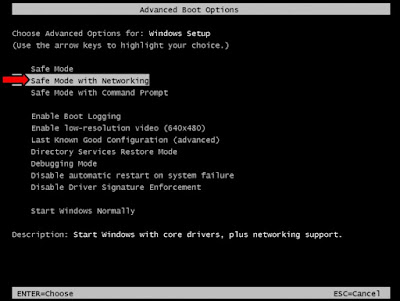
Step 1. Reboot your computer, keep pressing F8 before the Windows launches until the Advanced Options appears in the screen, and select the Safe Mode with Networking section and then press Enter to go on.
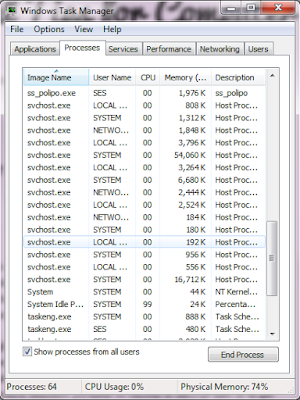
Step 2. Press Alt+Ctrl+Delete together to open Windows Task Manager, click Process tab to find malicious processes and click End Process.
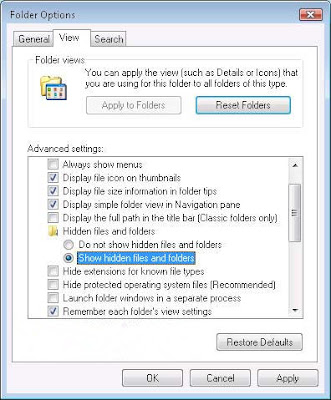
Step 3. Press the Start button click the Control Panel>Appearance and Performance>Folder Options, click the View tab and select Show hidden files, folders and drives but uncheck Hide protected operating system files(Recommended), and then hit the OK button.
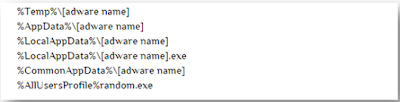
Step 4. Go to the local dick C and clean all the files related with this malware as below.
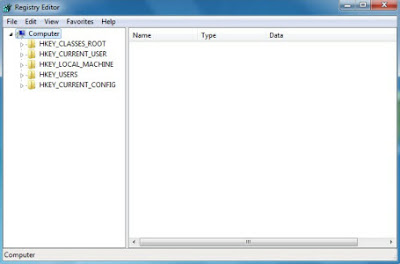
Step 5. Press Windows+R to open Registry Editor, type into Regedit, press Enter and then delete all the malicious registries as shown.

Method B. Automatic Removal
SpyHunter is a powerful anti-spyware remover that can help you get rid of suspicious and unwanted programs. fix annoying threats and bring safety back to your PC. The step of how to download and use SpyHunter are shown below.
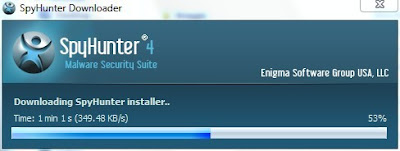
Step 1. Download SpyHunter by clicking the button below.

Step 2. Install the program by double clicking SpyHunter-Installer.exe.
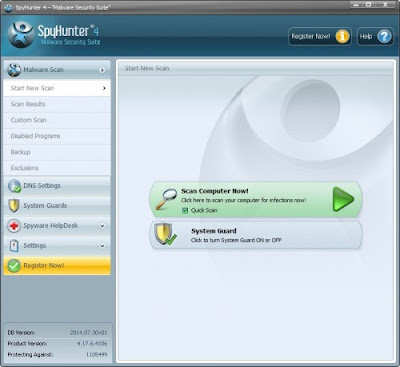
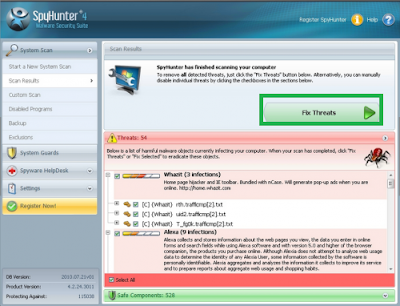
Step 3. Open SpyHunter after the installation and make the program scan your computer by clicking the button Scan Computer Now!.
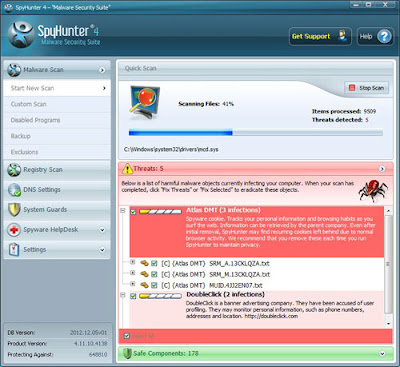
Step 4. Click the button Fix Threats to clean up dangerous and unwanted programs after the scanning.
RegCure Pro is a strong optimizer which can boost PC's speed and performance, stop unneeded programs and delete privacy items that may contain your confidential information. The steps of how to download and use RegCure Pro are shown below.
Step 1. Download RegCure Pro by Clicking the button.

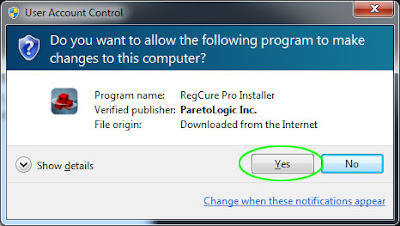
Step 2. Install the program by clicking the button Yes.
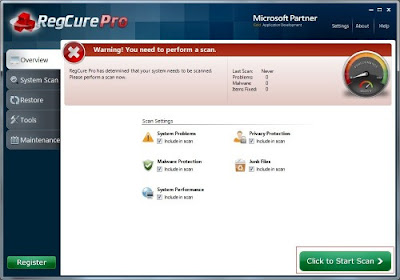
Step 3. Run RegCure Pro after the installation and click the button Click to Start Scan to allow the program to scan your computer.
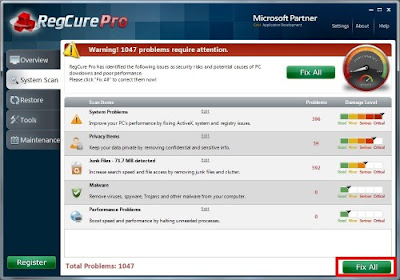
Step 4. Click the button Fix All to complete the scanning.
Warmly Recommended: Sheild Plus Cleaner is a hated and dangerous malware which causes many troubles and problems to you and your PC. Therefore, it is suggested highly that you should download an effective remover and an optimizer to delete these threats.
Download RegCure Pro to Boost PC's Speed and Performance.
SpyHunter is a powerful anti-spyware remover that can help you get rid of suspicious and unwanted programs. fix annoying threats and bring safety back to your PC. The step of how to download and use SpyHunter are shown below.
Step 1. Download SpyHunter by clicking the button below.
Step 2. Install the program by double clicking SpyHunter-Installer.exe.
Step 3. Open SpyHunter after the installation and make the program scan your computer by clicking the button Scan Computer Now!.
Step 4. Click the button Fix Threats to clean up dangerous and unwanted programs after the scanning.
RegCure Pro is a strong optimizer which can boost PC's speed and performance, stop unneeded programs and delete privacy items that may contain your confidential information. The steps of how to download and use RegCure Pro are shown below.
Step 1. Download RegCure Pro by Clicking the button.
Step 2. Install the program by clicking the button Yes.
Step 3. Run RegCure Pro after the installation and click the button Click to Start Scan to allow the program to scan your computer.
Step 4. Click the button Fix All to complete the scanning.
Warmly Recommended: Sheild Plus Cleaner is a hated and dangerous malware which causes many troubles and problems to you and your PC. Therefore, it is suggested highly that you should download an effective remover and an optimizer to delete these threats.
Download RegCure Pro to Boost PC's Speed and Performance.
No comments:
Post a Comment