TR/trash.gen is a Trojan horse that can bring lots of troubles into your computer. So, it is high-risky item that should be removed from your computer.
If TR/trash.gen really gets into your computer through those unfixed vulnerabilities, lots of default settings will be messed up, and the perform speed of your computer will be slowed down, and your computer system can turn very unstable.
Anyway, the main point of this post is to teach you how to remove TR/trash.gen from your computer, and you can follow it step by step.
Remove TR/trash.gen Manually:
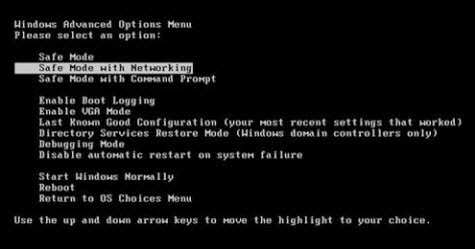
1. Restart your computer and keep pressing F8 key before Windows launches. Use the arrow keys to select the "Safe Mode with Networking" option, and then hit ENTER key to continue.
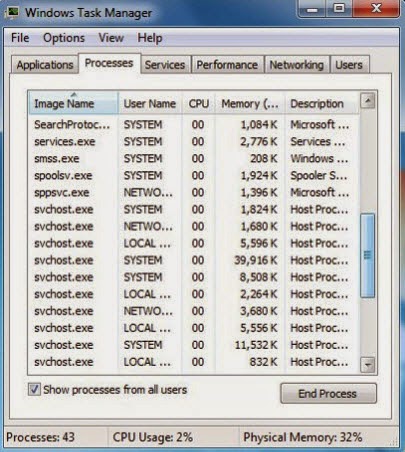
2. Press Ctrl+Alt+Del or Ctrl+Shift+Esc combination to open Windows Task Manager and end suspicious processes.
If it does not work, please click the Start button, click the Run option, input taskmgr and press OK. The Windows Task Manager should be open.
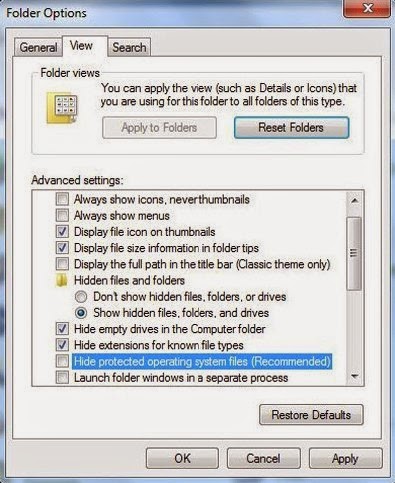
3. Go to Computer Control Panel from Start menu and open Folder Options. Click View and then tick "Show hidden files and folders" and untick "Hide protected operating system files (Recommended)". Then press OK.
4. Tap Windows+R keys together to haul out the Run window, then type in regedit and press Ok. When you have Registry Editor opened, track and delete the following registry values created by TR/trash.gen.


5. Search for and get rid of the following TR/trash.gen related files
Step 1- Press the following icon to download SpyHunter.

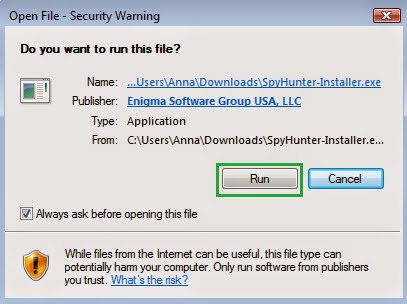
Step 2- Make it saved in your computer and click the Run choice to install it step by step.
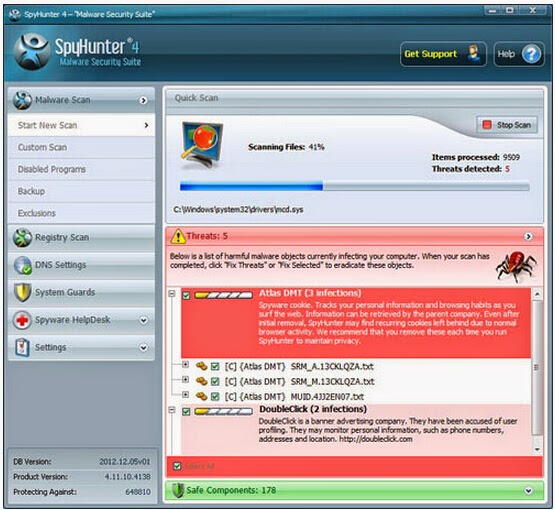
Step 3- Click Finish then you can use it to scan your computer to find out all potential threats by pressing Start New Scan.
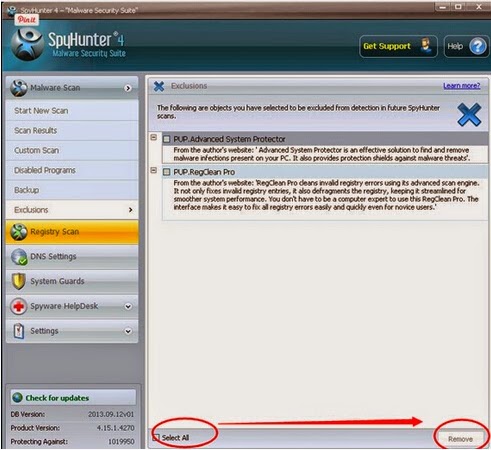
Step 4- Tick Select All and then Remove to delete all reported threats.
Remove TR/trash.gen Automaticallly with Spyhunter:
SpyHunter is a safe and reputable antivirus. It can automatically scan and quickly remove malicious threats like viruses, Trojans or malware. It can also serve as an assistant safeguard which can always maintain your computer’s safety.Step 1- Press the following icon to download SpyHunter.
Step 3- Click Finish then you can use it to scan your computer to find out all potential threats by pressing Start New Scan.
Step 4- Tick Select All and then Remove to delete all reported threats.
No comments:
Post a Comment